Wednesday, August 28, 2013
Fun at the Beach

This tutorial is my property, written by Jeannine’sTag,
any resemblance to another tutorial is a coincidence.
Do not share my tutorial, send a link to my blog.
Do not share my tutorial, send a link to my blog.
Supplies Needed:
PSP 9 (any version should work).
Tube of choice
Mine is “Last Summer" made by © The Hunter
This tube was a freebie for limited time on FB fan
page
FTU scrapkit "Last Summer" made by Bibi’s Collection
Like the FB page to get the kit
Font
of choice
2 mask of choice
http://insatiabledreams.net/
Drop shadow: 2 - 2 – 50 – 7
Lets get started…..!
Open new layer 750 x 750 - select all - open paper 3 - copy and paste into selection - select none
- apply you're mask - layers merge group
New raster layer - selct all - open paper 4 - copy and paste into
selection - select none - apply you're mask - layers merge group
Open
elements and resize (if needed):
Never work on the original design - always
shift D
(Be careful when you resize or
rotate it is sometimes
necessary to sharpen)
29 - original size
43 - width 600
5 - width 600
32 - original size
23 - width 500
3 - original size
36 - width 400
44 - original size -
rotate free left 20°
48 - width 75 - duplicate
27 - width 150
18 - width 150
34 - width 100
25 - width 250
4 - width 80
12 - width 250
28 - width 300
1 - width 350
13 - width 100
9 - width 75
19 - width 250
Place all items (look at
my tag for example)
Copy - Paste your tube as new layer. Resize if need it.
Add copyright info. Merge visible.
Add your name
Save as png or jpg.
Enjoy
this tutorial and I'd
like to see your results, you can
email me
Tuesday, August 27, 2013
Touch of Goth
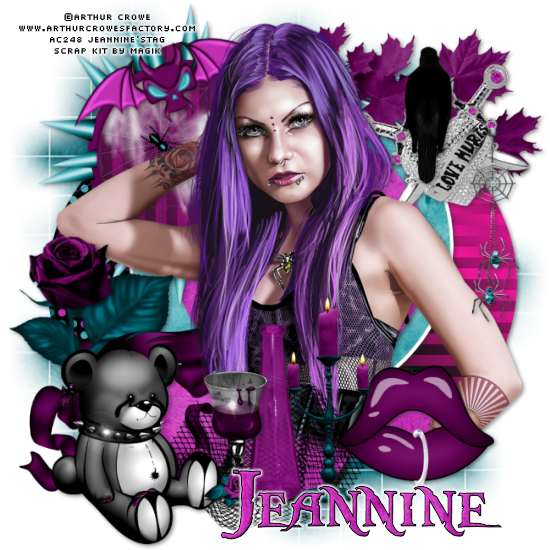
This tutorial is my property, written by Jeannine’sTag,
any resemblance to another tutorial is a coincidence.
Do not share my tutorial, send a link to my blog.
Do not share my tutorial, send a link to my blog.
Supplies Needed:
PSP 9 (any version should work).
Tube of choice
Mine is “Purple
shadow" made by ©Arthur Crowe
don’t use the tube without licence
You can buy the tube on Arthur Store
You can buy on PFD
Template 32 made by Magik
Font of choice
Mask of choice
Drop shadow: 2 - 2 – 50 – 7
Lets get started…..!
Open template – shift D – delete credit - image canvas size 650 x 650
center
Highlight
Background base - select all – open paper 2 - paste
into selection – select none - apply the mask – layers merge group
Left circle - select all – selection float – defloat -
open paper 7 – copy & paste as new layer – selection invert – delete – add
drop shadow
Middle circle - select
all – selection float – defloat - open paper 1 – copy & paste as new layer
– selection invert – delete – add drop shadow
Right middle circle -
select all – selection float – defloat - open paper 3 – copy & paste as new
layer – selection invert – delete – add drop shadow
Triple circle background
- select all – selection float – defloat - open paper 5 – copy & paste as
new layer – selection invert – delete – add drop shadow
Triple circle - select
all – selection float – defloat - open paper 3 – copy & paste as new layer
– selection invert – delete – add drop shadow
Open
elements and resize (if needed):
Never work on the original design - always
shift D
(Be careful when you resize or
rotate it is sometimes
necessary to sharpen)
Web - width 2150
Ribbon 2 - width 250
Charm width 200 - rotate free left 20°
Rose 2 - width 200 - iùage mirror
Winged skull - width 250
Lips - width 200
Netting - width 250
Spider charm - width 100
Ivy - width 350
Bear - width 150
Frame 1 - width 350
Crow - width 140
Drink - width 100
Candelabra - width 100
Bottle - width 75
Place all items (look at my tag for example)
Copy - Paste your tube as new layer. Resize if need it.
Add copyright info. Merge visible.
Add your name
Save as png or jpg.
Enjoy
this tutorial and I'd
like to see your results, you can
email me
Tuesday, August 20, 2013
Autumn Melody

This tutorial is my property, written by Jeannine’sTag,
any resemblance to another tutorial is a coincidence.
Do not share my tutorial, send a link to my blog.
Do not share my tutorial, send a link to my blog.
Supplies Needed:
PSP 9 (any version should work).
Tube of choice
Mine is “Orange Sunshine" made by Barbara Jensen
You may not use this tube without licence
PTU scrapkit Autumn Music made by HF Projekte
You can buy the kit on Inspirations Of Scrafriends
http://inspirationsofscrapsfriends.com/shop/index.php?main_page=
Font
of choice mine is Penabico
Mask of choice
http://insatiabledreams.net/
Drop shadow: 2 - 2 – 50 – 7
Lets get started…..!
Open new layer 800 x 800 - select all - open paper 1 - copy and paste into selection - select none
- apply you're mask - layers merge group
Open element 13 - copy and paste on the left top side - clic inside the
frame with magic wand - selection modify - expand 5 - open paper 2 - copy and
paste as new layer - selection invert - delete - open close up from tube copy
and paste as new layer - copy - effect blind with these setting

Layer arrange send to bottom
Open
elements and resize (if needed):
Never work on the original design - always
shift D
(Be careful when you resize or
rotate it is sometimes
necessary to sharpen)
3 - height 600
34 - width 500
61 - width 200
58 - width 150
25 - width 250
55 - width 200
45 - width 230
20 - width 150
51 - width 230
3 - width 230
48 - width 230
14 - original size
4 - original size
18 - width 700 - image flip
Place all items (look at
my tag for example)
Copy - Paste your tube as new layer. Resize if need it.
Add copyright info. Merge visible.
Add your name
Save as png or jpg.
Enjoy
this tutorial and I'd
like to see your results, you can
email me
Subscribe to:
Posts
(Atom)
My Blog List
-
-
NEWS6 years ago
-


Weather in Liège
