Saturday, September 29, 2012
Wages of Sin

This tutorial is my property, written by Jeannine’sTag,
any resemblance to another tutorial is a coincidence.
Do not share my tutorial, send a link to my blog.
Do not share my tutorial, send a link to my blog.
Supplies Needed:
PSP 9 (any version should work).
Tube of choice
Mine is Wages Of
Sin from Gina King
You may not use
this tube without licence
Buy the tube on CDO
PTU scrap kit “Orange fun” from Bibi’s Collection
Go to her blog to see where you can buy the kit
Halloween template 4 from Samantha
Exclusive template for Creative Misfits Creations
Font of choice mine is Burton's Nightmare 2000
Mask of choice
Drop shadow: 2 - 2 – 60 – 7
Lets get started…..!
Open template – shift D – delete credit & fangs – resize 600
Highlight
Open new raster layer – layer arrange – send to bottom – select all –
open paper 9 - paste into selection – select none – apply the mask –layers
merge group
Rectangle back –
selection – select all – float – defloat –open paper 1 – copy and paste as new
layer – selection invert – delete – add drop shadow
Oval back – selection – select all – float –
defloat –open paper 8 – copy and paste as new layer – selection invert – delete
– add drop shadow
Back – selection –
select all – float – defloat - open paper 2 – copy and paste as new layer –
selection invert – delete – add drop shadow
Left bottom back –
selection – select all – float – defloat - open paper 3 – copy and paste as new
layer – selection invert – delete – add drop shadow
Left top back –
selection – select all – float – defloat - open paper 6 – shift d – resize width
250 – copy and paste as new layer – selection invert – delete – add drop shadow
Circle back – selection
– select all – float – defloat - open paper 1 – copy and paste as new layer –
selection invert – delete – add drop shadow
Add drop shadow on all
word art
Layers merge visible
Open
elements and resize (if needed):
Never work on the original design - always
shift D
(Be careful when you resize or
rotate it is sometimes
necessary to sharpen)
Element 100 – width 200
Element 22 – original size
Element 23 – original size
Element 11 – width 200
Element 71 – width 100
Element 29 – width 150
Element 30 – original size
Element 52 – width 150
Element 25 – width 150
Element 73 – width 150
Element 42 – width 150
Element 16 – width 80
Element 60 – width 100
Element 79 – width 80
Element 7 – width 50
Element 75 – width 80
Element 6 – width 50
Element 77 – width 50
Place all items (look at
my tag for example)
Copy - Paste your tube as new layer. Resize if need it.
Add copyright info. Merge visible.
Add your name and give a little inner bevel
I resize mine width 520
Save as png or jpg.
Enjoy
this tutorial and I'd
like to see your results, you can
email me
Monday, September 24, 2012
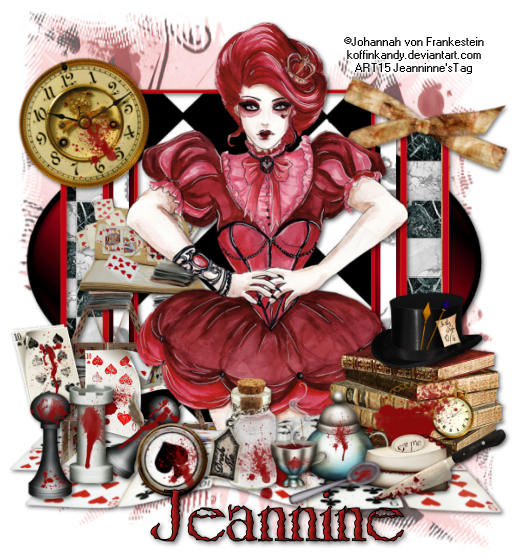
Queen of Madness
This tutorial is my property, written by Jeannine’sTag,
any resemblance to another tutorial is a coincidence.
Do not share my tutorial, send a link to my blog.
Do not share my tutorial, send a link to my blog.
Supplies Needed:
PSP 9 (any version should work).
Tube “Red
Queen” from Johannah von Franhestein
You may not use
this tube without licence
PTU scrap kit “Madness” from Irish Bitch Designs
Both can buy in store from Artistic Reality Talent
Template 110 from Beth
Font: Grunge Caltek Bold (pay font)
Mask of choice
Drop shadow: 2 - 2 – 60 – 7
Lets get started…..!
Open template – shift D – delete credit & WA – resize 550 – image
canvas size 600 x 600 center
Highlight
Raster 1– select all – open paper 8 - paste into selection – select none
– apply the mask –layers merge group
Lg black rectangle –
selection – select all – float – defloat –open paper 10 – copy and paste as new
layer – selection invert – delete – add drop shadow
Rigth thin rectangle –
selection – select all – float – defloat –open paper 7 – copy and paste as new
layer – selection invert – delete – add drop shadow
Do the same action with left
thin rectangle
Left rectangle
background – selection – select all – float – defloat - open paper 12 – copy
and paste as new layer – selection invert – delete – add drop shadow
Do the same action with right
rectangle background
Layers merge visible
Open
elements and resize (if needed):
Never work on the original design - always
shift D
(Be careful when you resize or
rotate it is sometimes
necessary to sharpen)
House of cards – width 300
Cards 1 – width 550
Books – width 200
Clock – width 250 – imùage rotate free left 20°
Tea pot – width 120
Bow 3 – width 200 –
Cup – width 75
Button – width 150
Chess – width 100
Chess 3 – width 50
Chess 1 – width 50
Drink me – width 100
Knife 1 – width 150
Card 2 – width 150
Card – width 100
Cake – width 100
Spoon – width 110
Place all items (look at
my tag for example)
Copy - Paste your tube as new layer. Resize if need it.
Add copyright info. Merge visible.
Add your name and give a little inner bevel
I resize mine width 520
Save as png or jpg.
Enjoy
this tutorial and I'd
like to see your results, you can
email me
Saturday, September 22, 2012
Razorblade Kiss

This tutorial is my property, written by Jeannine’sTag,
any resemblance to another tutorial is a coincidence.
Do not share my tutorial, send a link to my blog.
Do not share my tutorial, send a link to my blog.
Supplies Needed:
PSP 9 (any version should work)
PTU scrap kit “Shot through the heart” from Sleek nSassy Designz
You can buy the kit on ScrappinDollars
RazorbladeKiss template by Magik
Font: P22 Corinthia (Pay font)
Mask of choice
Drop shadow: 2 - 2 – 60 – 7
Plug-in Tramage “town the line” default setting
Lets get started…..!
Open template – shift D – delete credit, HIM Razorblade – resize 550 – image canvas size 600 x 600 center
Highlight
Background – select all – open paper 4 - paste into selection – select
none – apply the mask –layers merge group
Bar 1 – selection –
select all – float – defloat –open paper 14 – copy and paste as new layer –
selection invert – delete – add drop shadow
Do the same action with
Bar 2
Oval– selection – select
all – float – defloat –open paper 10 – copy and paste as new layer – selection
invert – delete – add drop shadow
Top diamond – selection –
select all – float – defloat - open paper 13 – copy and paste as new layer –
selection invert – delete – add drop shadow
Do the same action with
bottom diamond
Rectangle base –
selection – select all – float – defloat - open paper 11 – copy and paste as
new layer – selection invert – delete – add drop shadow
Rectangle frame –
selection – select all – float – defloat - open paper 4 – copy and paste as new
layer – selection invert – delete – add drop shadow
Funeral of hearts –
selection – select all – float – defloat - open paper 6 – copy and paste as new
layer – selection invert – delete – apply the plug-in tramage town the line –
add drop shadow
Layers merge visible
Open
elements and resize (if needed):
Never work on the original design - always
shift D
(Be careful when you resize or
rotate it is sometimes
necessary to sharpen)
Zipped Lips 2 – width 300 – image rotate free left 20°
Heart 2 – width 400 – image mirror
Bloody heart –width 200 – image rotate free right 20°
Gun – width 150 – image rotate free left 20°
Marriage certificate – width 200 – image rotate free right 20°
Lock2 – width 80
Key – width 150
Hat – width 150
Crow – width 75
Hearts – width 200
Sword – width 150
Flower petals – width 300
Place all items (look at
my tag for example)
Copy - Paste your tube as new layer. Resize if need it.
Add copyright info. Merge visible.
Add your name
I resize mine width 520
Save as png or jpg.
Enjoy
this tutorial and I'd
like to see your results, you can
email me
Subscribe to:
Posts
(Atom)
My Blog List
-
-
NEWS6 years ago
-
