Saturday, March 18, 2017
Born to be Wild

This tutorial is my property, written by
Jeannine’sTag,
any resemblance to another tutorial is a
coincidence.
Do not share my tutorial, send a link to my blog.
Do not share my tutorial, send a link to my blog.
Supplies Needed:
PSP 9 (any version should work).
Scrapkit
“Pets Love” by Chachaz Creationz

This
kit contain 66 elements and 7 papers
Can
be found here
Tube of choice mine is “Easy Rider” by
Zlata_M

Can be found at PFD
Template 156 by Kristin
Font
of choice mine is "Graffiti"
Drop shadow: 2 - 2 – 50 – 7
Open template – remove credit – image canvas size
800 x 800
Background - select all – c/p paper 1 – apply the
mask – layers – merge group
Highlight
Right
circle & left circle – selection float – defloat - open paper 5 – copy
& paste as new layer – selection invert – delete – add drop shadow
Circle
– selection float – defloat - open paper 1 – copy & paste as new layer –
selection invert – delete – add drop shadow
Rectangle
right & left – selection float – defloat - open paper 2 – copy & paste
as new layer – selection invert – delete – add drop shadow
Rectangle
2 – selection float – defloat - open paper 4 – copy & paste as new layer –
selection invert – delete – add drop shadow
Open
elements and resize (if needed):
Never work on the original design -
always shift D
(Be careful when you
resize or
rotate it is
sometimes necessary to sharpen)
16
– width 400
49
– width 240
59
– width 200
34
– width 200
44
– width 300 – image mirror
51
– original size
52
– width 300
48
– width 260
7
– width 400
45
– width 180
55
– width 200 – rotate free right 15°
61
– width 300
46
– width 120
5
– adjust – color balance – manual color correction – from purple to brown - width
180
18
– width 250
45
– width 220
47
– width 100
Place
all items (look at my tag for example)
Copy - Paste your tube as new layer. Resize if need
it.
Add copyright info. Merge visible.
Add your name and give a effect (Optional) Eye Candy 5 Impact/glass qith this setting

Enjoy
this tutorial and I'd like to see your results, you can email
me
Friday, March 17, 2017
Dangerous Glamourous

This tutorial is my property, written by
Jeannine’sTag,
any resemblance to another tutorial is a
coincidence.
Do not share my tutorial, send a link to my blog.
Do not share my tutorial, send a link to my blog.
Supplies Needed:
PSP 9 (any version should work).
Scrapkit
“Welcome to Paris” from Bella
Caribena

Stunning
kit. Beautiful combinationof red, black and gold.
This
kit contains 90 elements and 15 papers
Dreaming
with Bella: http://dreamingwithbella.com/store/
ScrapandTubes: http://www.scrapandtubes.com/shop/index.php…
DigiDivas:
http://digidivas.co.uk/shop/index.php…
MysticalScraps:
http://www.mysticalscraps.com/index.php…
Tube
of choise mine is “ Samantha” by Chris Pastel
Template
3 by Tamie
Mask
of choice mine is Easy Street EPS (PTU)
Font
of choice
Drop shadow: 2 - 2 – 50 – 7
Lets get
started…..!
Open template – remove credit – image canvas size
800 x 800
Background - select all – c/p paper 7 – apply the
mask – layers – merge group
Highlight
8
& all 8 copy – selection float – defloat - open paper 4 – copy & paste
as new layer – selection invert – delete – add drop shadow
4
& copy – selection float – defloat - open paper 14 – copy & paste as
new layer – selection invert – delete – add drop shadow
7
& 2– selection float – defloat - open paper 8 – copy & paste as new
layer – selection invert – delete – add drop shadow
5–
selection float – defloat - open paper 12 – copy & paste as new layer –
selection invert – delete – add drop shadow
1– selection float – defloat - open
paper 7 – copy & paste as new layer – selection invert – delete – add drop
shadow
3–
selection float – defloat - open paper 4 – copy & paste as new layer –
selection invert – delete – add drop shadow
Open
elements and resize (if needed):
Never work on the original design -
always shift D
(Be careful when you
resize or
rotate it is
sometimes necessary to sharpen)
39
–original size
77
– width 300
30
– width 150
72
– width 200
87
– width 100
56
– width 500
38
– width 200
3
– width 205 – adjust – color balance – manual color correction – from dark grey
to white
42
– width 300 – duplicate
20
– width 250
83
– width 250
35
– width 300 – image flip
26
– width 200
67
– width 250
78
– original size
41
– width 250
44
– width 120
27
– width 150
60
– width 120
14
– width 150
15
– width 350
Place
all items (look at my tag for example)
Copy - Paste your tube as new layer. Resize if need
it.
Add copyright info. Merge visible.
Add your name and give a little Inner Bevel effect
Enjoy
this tutorial and I'd like to see your results, you can email
me
Thursday, March 16, 2017
Miz Bitch

This tutorial is my property, written by
Jeannine’sTag,
any resemblance to another tutorial is a
coincidence.
Do not share my tutorial, send a link to my blog.
Supplies Needed:
PSP 9 (any version should work).
Scrapkit
“Dana 2” by Chachaz Creationz

This
kit contain 75 elements and 8 papers
Can
be found here
Great
match kit for the tube “Dana 2” by KiwiBG

Can
be found here:
Template
MzBitch by Dee
Font
of choice
Drop shadow: 2 - 2 – 50 – 7
Open template – remove credit – image canvas size
800 x 800
Background - select all – c/p paper 3 – apply the
mask – layers – merge group
Highlight
Top
circle & bottom circle – adjust – color balance – choice à color from kit
or tube
Top
square & bottom square – alien skin – eye candy 5 impact - chrome
Top
grey strip & bottom grey strip – selection float – defloat - open paper 3 –
copy & paste as new layer – selection invert – delete – add drop shadow
Black
oval – selection float – defloat - open paper 1 – copy & paste as new layer
– selection invert – delete – add drop shadow
Open
elements and resize (if needed):
Never work on the original design -
always shift D
(Be careful when you
resize or
rotate it is
sometimes necessary to sharpen)
25
36 – width 250
47
– original size
51
– width 250
37
– width 180
27
– width 120
5
– width 120
2
– width 220
15
– width 100
38
– width 250
6
– width 180
42
– original size
19
– width 250 – rotate free left 15°
14
– width 75
34
– width 300
16
–width 80
12
– width 100
4
– width 120
8
– width 150
Place
all items (look at my tag for example)
Copy - Paste your tube as new layer. Resize if need
it.
Add copyright info. Merge visible.
Add your name and give a little Inner Bevel effect
Enjoy
this tutorial and I'd like to see your results, you can email
me
Tuesday, March 14, 2017
Spunky Spring

This tutorial is my property, written by
Jeannine’sTag,
any resemblance to another tutorial is a
coincidence.
Do not share my tutorial, send a link to my blog.
Supplies Needed:
PSP 9 (any version should work).
Scrapkit
“Butterfly” by Chachaz Creationz
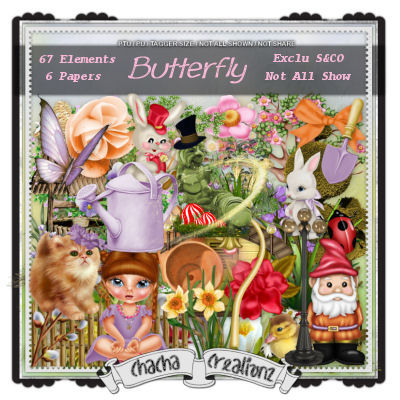
Can
be found here
Tube
of choice mine is “Mrs Burtterfly” by Lysisange

You
may not use this tube without licence
Template
Spunky Spring by Millie
Font
of choice
Drop shadow: 2 - 2 – 50 – 7
Open template – remove credit – image canvas size
800 x 800
Background - select all – c/p paper 6 – apply the
mask – layers – merge group
Highlight
1
& 3 – selection float – defloat - open paper 1 – copy & paste as new
layer – selection invert – delete – add drop shadow
7
& 8 – selection float – defloat - open paper 6 – copy & paste as new
layer – selection invert – delete – add drop shadow
For
the others layer – adjust – color balance – manual color correction – choice colors
from kit or tube
Open
elements and resize (if needed):
Never work on the original design -
always shift D
(Be careful when you
resize or
rotate it is
sometimes necessary to sharpen)
25
– width 550
43
– width 400
60
– width 300
63
– width 400
15
– width 300
58
– width 250
36
– width 200
64
– width 170
9
– width 200
61
– width 85
37
– width 100
67
– width 85
22
– width 80
7
– width 80
41
– width 50
45
– width 80
5
– width 120
Place
all items (look at my tag for example)
Copy - Paste your tube as new layer. Resize if need
it.
Add copyright info. Merge visible.
Add your name and give a little Inner Bevel effect
Enjoy
this tutorial and I'd like to see your results, you can email
me
Subscribe to:
Posts
(Atom)
My Blog List
-
-
NEWS6 years ago
-
