Tuesday, November 29, 2011
Winter Magic PTU

This tutorial is my property, written by Jeannine’sTag,
any resemblance to another tutorial is a coincidence.
Do not share my tutorial, send a link to my blog.
Do not share my tutorial, send a link to my blog.
Supplies Needed:
PSP all version will work
Tube of choice. I am using “Tanglet” by ©Caron Vinson
This is a bonus tube with 10$ purchase Vinson tubes
You may not use this artwork without first obtaining a license to do so.
Get them on CreativeDesign Outlet
PTU Scrapkit “Jack Frost” from Gina’sGem Scraps
Go to her blog to see where you can buy the kit
“Happy Holidays” template from Angi Rique
Font: Murphy Script
Lets get started…..!
Open template – shift D - Close original - Remove “credit”
Resize width 550 – image canvas size – 600 x 600 center
Hightlight
Top right Pink Circle – select all – float – defloat – open paper 13 – paste as new layer – selection invert – delete – drop shadow
Bottom Left Pink Circle– select all – float – defloat – open paper 22 – paste as new layer – selection invert – delete – drop shadow
Top Left Square & Bottom Right Square – adjust – color balance – manual color correction – choice a color from you tube
Center Oval Black – select all – float – defloat – open paper 17 – paste as new layer – selection invert – delete – adjust – add noise – uniform – monochrome 20 - drop shadow
Pink Center Oval – select all – float – defloat – open paper 9 – paste as new layer – selection invert – delete – drop shadow
Remove Snow Flake from template
Open elements and resize:
(Be careful when you resize or rotate it is sometimes necessary to sharpen)
Brush 1 – width 550
Berries 2 – height 450
Bells (from addon) – width 180
Icicles 2 – width 320
Moon Santa – width 180 – image rotate free right 20°
Snowflake Spray – width 250
Snowflake Spray 2 – width 250 – duplicate – image mirror – image flip
Gift Box 4 – width 120
Gift Box 1 – width 120 – image rotate free left 15°
Gift Box – adjust – color balance – manual color correction with these setting
Gift Box 3 – width 150 – image mirror – image rotate free right 15°
Resize width 120 – image flip
Poinsettia 3 – width 120
Poinsettia 2 – width 100 – image mirror
Poinsettia 1 – width 130 – image mirror – image rotate free left 25°
Add drop shadow and place all items (look at my tag for example)
Copy - Paste your tube as new layer. Resize if need it.
Add your name and copyright info. Merge visible.
I resize mine width 480
Save as png or jpg.
Have fun…..
Sunday, November 27, 2011
To My Friend PTU

This tutorial is my property, written by Jeannine’sTag,
any resemblance to another tutorial is a coincidence.
Do not share my tutorial, send a link to my blog.
Do not share my tutorial, send a link to my blog.
Supplies Needed:
PSP
Tube of choice. I am using “Goff” from Screaming Demons
You may not use this artwork without first obtaining a license to do so.
You can buy the tube at Scraps and the city
PTU Scrapkit “To my Friend” from Schnegge
You can buy the kit on DreamScape Imaging
Mask: HorsePlay’s Pasture Mask 19
Drop shadow: 2 - 2 –75 – 5
Font: Lysandria
Plugin: Eye Candy 4000 “Gradient Glow” with these setting and color white

Lets get started…..!
Open a new image 600 x 600 – select all – open paper 15 – apply the mask – layers merge groupe
Open Glitter 02 – copy and paste as new layer
Open “Frame 01” – copy and paste as new layer – click inside the frame with Magic Wand Tool – selection – modify – expand 3
Open paper 02 – paste as new layer – selection invert – delete – layers arrange – move down
Open “Glitter Circle” paste on the frame
Open elements and resize if it need:
(Be careful shift D the original element and work with the copy - when you resize or rotate it is sometimes necessary to sharpen)
Chalice – width 120
Chocolate Box – width 200
Clock – width 150 – rotate free left 20°
Flower 06 – width 150 – rotate free left 20°
Stones – width 200 – when you paste – duplicate and mirror
Swirl – height 300 – image mirror
Butterfly 04 –width 120
Place all items – add drop shadow (look at my tag for example)
Copy - Paste you tube as new layer.
Copy - Paste you tube as new layer.
Open WA 02 – adjust –color balance – manual color correction from white to red
With magic wand select this WA


Copy and paste as new layer – rotate free left 110° - add glow and drop shadow
Add your name and copyright info. Merge visible
Save as png or jpg.
Have fun…..
Friday, November 25, 2011
Cornucopia

This tutorial is my property, written by Jeannine’sTag,
any resemblance to another tutorial is a coincidence.
Do not share my tutorial, send a link to my blog.
Do not share my tutorial, send a link to my blog.
Supplies Needed:
PSP all version will work
Tube of choice. I am using “Cornicopia” by ©Amberly Berendson
You may not use this artwork without first obtaining a license to do so.
Get them on MyTubedArt
PTU Scrapkit “Fall Fairy" from PuddicatCreations
You can buy the kit on Scrappin Dollars
Template « Thanksgiving » there is no credit on the template
Download HERE
If you recognize this template, let me know and I will credited
Mask of choice
Plugin: Eye Candy 4000 “Gradient Glow” with these setting and color brown


Drop shadow: 2 - 2 –75 – 5
Font: LuxuryRoyaleJF
Lets get started…..!
Open template – shift D - Close original - Remove “credit”
Resize width 550 – image canvas size – 600 x 600 center
Layers – new raster layer – select all – open paper 16 – paste into selection - apply the mask – layers merge group – layers arrange “send to bottom”
Delete raster 3 – 5 – 6 – copy of Raster 6 - 10
Hightlight
Group 1 & copy of raster 3 – select all – float – defloat – open paper 9 – paste as new layer – selection invert – delete - eye candy 4000 “gradient glow” – drop shadow
Raster 7 – select all – float – defloat – open paper 11 – paste as new layer – selection invert – delete - eye candy 4000 “gradient glow” – drop shadow
Copy of raster 1 – select all – float – defloat – open paper 15 – paste as new layer – selection invert – delete - eye candy 4000 “gradient glow” – drop shadow
Raster 2 and Copy of raster 2 – select all – float – defloat – open paper 14 – paste as new layer – selection invert – delete - eye candy 4000 “gradient glow” – drop shadow
Open elements and resize:
(Be careful when you resize or rotate it is sometimes necessary to sharpen)
Branch 1 – height 350
Bird 2 – width 80
Branch 2 – width 400 – image mirror – image flip
Branch 3 – height 300
Lanturn – width 120
Cornucopia – width 180
Bird 1 – width 65
Place all items (look at my tag for example)
Copy - Paste your tube as new layer. Resize if need it.
Add your name and copyright info. Merge visible.
I resize mine width 500
Save as png or jpg.
Have fun…..
Monday, November 14, 2011
Mythical Winter PTU

This tutorial is my property, written by Jeannine’sTag,
any resemblance to another tutorial is a coincidence.
Do not share my tutorial, send a link to my blog.
Do not share my tutorial, send a link to my blog.
Supplies Needed:
PSP
Tube of choice. I am using “November” it’s a free bonus tube with 10$ spend on any ©Anna Marine tubes
You may not use this artwork without first obtaining a license.
Get it on Creative Design Outlet http://www.cdoestore.com/
PTU Scrapkit “Winter Elegance” from Mythical Designs
Buy this kit on Aussie ScrapDesigns
Mask: Gemsmasks 153
Drop shadow: 1 – 1 – 50 - 8
Lets get started…..!
Open a new image 600 x 600 – select all – open paper 4 – paste into selection – select none - – apply the mask – layers merge groupe
Open element 6 – height 300 – paste as new layer two square from left side and 10 from bottom (duplicate – mirror)
Open again element 6 – resize 450 – copy and paste as new layer – duplicate image mirror
With this gradient

draw a rectangle – Line Style solid – width 10 – 350 x 310 pixels
Layers – convert to raster layer – with magic wand click inside the rectangle – layers – modify – expand 3
Open paper 5 – resize 400 – Copy and paste as new layer – selection invert – delete – layer arrange – move down
Open element 18 – adjust – color balance – manual color correction from white to blue from the tube – paste as new layer - the rectangle - remove the overlap of the rectangle
Open element 4 – resize height 200 – copy and paste on the tight side from the rectangle – duplicate – image mirror
Open elements and resize if it need: (Be careful shift D the original element and work with the copy - when you resize or rotate it is sometimes necessary to sharpen)
Element 6 – height 300 (duplicate – mirror)
Element 22 – width 550
Element 8 – width 80
Element 45 – width 120
Element 31 - width 100
Place all items (look at my tag for example)
Copy - Paste your tube as new layer. Resize if need it.
Open layer 4 from the tube – paste as new layer on left side
Open layer 5 – with freehand selection (feather 20/smoothing 20) secte a part from butterfly and ribbon – copy and paste on the top left edge from the frame – duplicate – place on bottom right edge
Add your name and copyright info. Merge visible
Save as png or jpg.
Have fun…..
Sunday, November 13, 2011
A time to remember PTU

This tutorial is my property, written by Jeannine’sTag,
any resemblance to another tutorial is a coincidence.
Do not share my tutorial, send a link to my blog.
Do not share my tutorial, send a link to my blog.
Supplies Needed:
PSP
Tube of choice. I am using “Blackthorn And Rowen” from ©Morgan Fitzsimons
You may not use this artwork without first obtaining a license to do so.
Get it on MyTubedArt
PTU Scrapkit “A Time to Remeber” from Gemini Creationz
Mask: Gemsmasks 151
Drop shadow: 2 - 2 –60 – 7
Lets get started…..!
Open a new image 600 x 600 – select all – open paper 10 – paste into selection – select none - – apply the mask – layers merge groupe - lower opacity to 50
Be careful shift D the original element and work with the copy
Butterflycluster – resize width 500 – C/P on the left top from layer
Open “Frame 5” – resize width 420 – paste as new layer
With magic wand click inside the frame – selection – modify – expand 3
Open paper 02 – shift D – resize width 500 – paste as new layer – selection invert – delete – layers arrange – move down
Open “Greenerypink1”– C/P on the frame
Open elements and resize if it need: (Be careful shift D the original element and work with the copy - when you resize or rotate it is sometimes necessary to sharpen)
Greenery3 – width 200
Fabricflower4 – width 120
Flower1 – width 150
Rose – width 100
Bird – width 80
Letter – width 120 – rotate free left 20°
Butterfly – width 80
Vintage light – width 180
Sparkles – width 550
Place all items (look at my tag for example)
Copy - Paste your tube as new layer. Resize if need it.
Add your name and copyright info. Merge visible
Save as png or jpg.
Have fun…..
Thursday, November 10, 2011
Turkey Day

This tutorial is my property, written by Jeannine’sTag,
any resemblance to another tutorial is a coincidence.
Do not share my tutorial, send a link to my blog.
Do not share my tutorial, send a link to my blog.
Supplies Needed:
PSP
Tube of choice. I am using a tube from Elizabeth Austin
You may not use this artwork without first obtaining a license to do so.
Get it on UYA
PTU Scrapkit “Turkey Day” from Sweet Occasion Designs
You can buy the kit at Scrappin Dollars
Mask: Gemsmasks 151
Drop shadow: 2 - 2 –75 – 5
Font: A&S Black Swan
Lets get started…..!
Open a new image 600 x 600 – select all – flood file with a soft gradient – apply the mask – layers merge groupe
Open Flair1 – resize width 300 – paste as new layer
Open “Flower frame1” resize width 450 – copy paste on the flair
Open elements and resize if it need:
(Be careful shift D the original element and work with the copy - when you resize or rotate it is sometimes necessary to sharpen)
Autumn basket – width 350 – image mirror
Flower06 – width 300
Flower03 – width 200
Give thanks sign – width 200
Turkey 1 – width 150
Place all items (look at my tag for example)
Copy - Paste your tube as new layer. Resize if need it.
Add your name and copyright info. Merge visible
Save as png or jpg.
Have fun…..
Wednesday, November 9, 2011
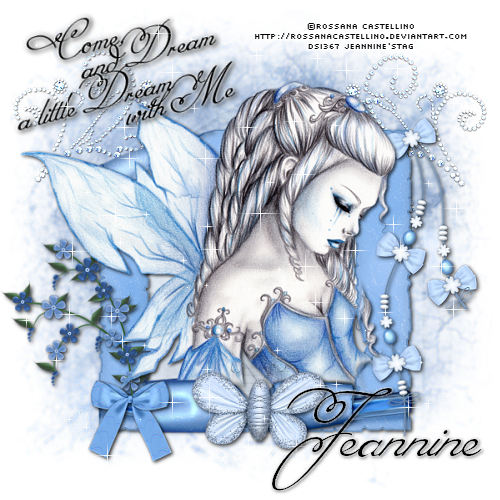
Fairy Dream PTU
This tutorial is my property, written by Jeannine’sTag,
any resemblance to another tutorial is a coincidence.
Do not share my tutorial, send a link to my blog.
Do not share my tutorial, send a link to my blog.
Supplies Needed:
PSP
Tube of choice. I am using “Winterfairy” from Rossana Castellino
You may not use this artwork without first obtaining a license to do so.
Get it on DSI
PTU Scrapkit “Dream Little Dream” from Schnegge
Mask: Gemsmasks 151
Plugin: VM Natural - constellation
Drop shadow: 2 - 2 –75 – 5
Font: MissFajardose
pay font HERE
Lets get started…..!
Open a new image 600 x 600 – select all - open paper 2 – copy & paste into selection – selection – select none – apply the mask – layers merge groupe
Open “Bling 1” paste on the top right side from the layer – duplicate –
image - mirror
Open frame 3 – resize width 380 – copy and paste as new layer – erase the two pieces of ribbon through the bottom of the frame – draw a square into the frame

new raster layer – open paper 5 – paste as new layer – selection invert – delete - layer arrange send to bottom
Open elements and resize if it need: (Be careful shift D the original element and work with the copy - when you resize or rotate it is sometimes necessary to sharpen)
String 2
Butterfly 1 – width 160
Flower 2 – width 180 – image mirror
Word art White Shadow – width 280 – rotate free left 20°
Bow 5 – width 100
Place all items (look at my tag for example)
Copy - Paste your tube as new layer. Resize if need it.
Add your name and copyright info. Merge visible
Plugin VM natural – constellation with these setting

Save as png or jpg.
Have fun…..
Subscribe to:
Posts
(Atom)
My Blog List
-
-
NEWS 20203 years ago
-
